Showing posts with label mold. Show all posts

Thursday, March 1, 2018

Indoor Air Quality is a Rising Concern for Home Buyers

The spring and summer months are the busiest time of year for the real estate market. Whether you are building your dream home or purchasing an older home that has been listed on the market, indoor air quality should be a major priority during your search. Learn about how you can make sure your future home’s air is safe and healthy by addressing these concerns BEFORE you buy.
Indoor air concerns when building new construction:
Opting to build a new home will provide you with the greatest opportunity to ensure your indoor air quality is healthy. During the past decade, home builders have documented a sharp increase in the number of buyers looking for eco-friendly building materials. From cabinets to flooring, buyers want to purchase materials that are sustainable for the environment and free of dangerous chemicals such as formaldehyde.
Builders that are able to address a buyer’s health concerns about toxic building materials and indoor air quality have a higher perceived home value and positive brand impact when compared to other builders. Buyers are willing to spend more money in order to select from eco-friendly building materials that are not only better for the environment but that are also better for your family.
Indoor air concerns when buying an existing home:
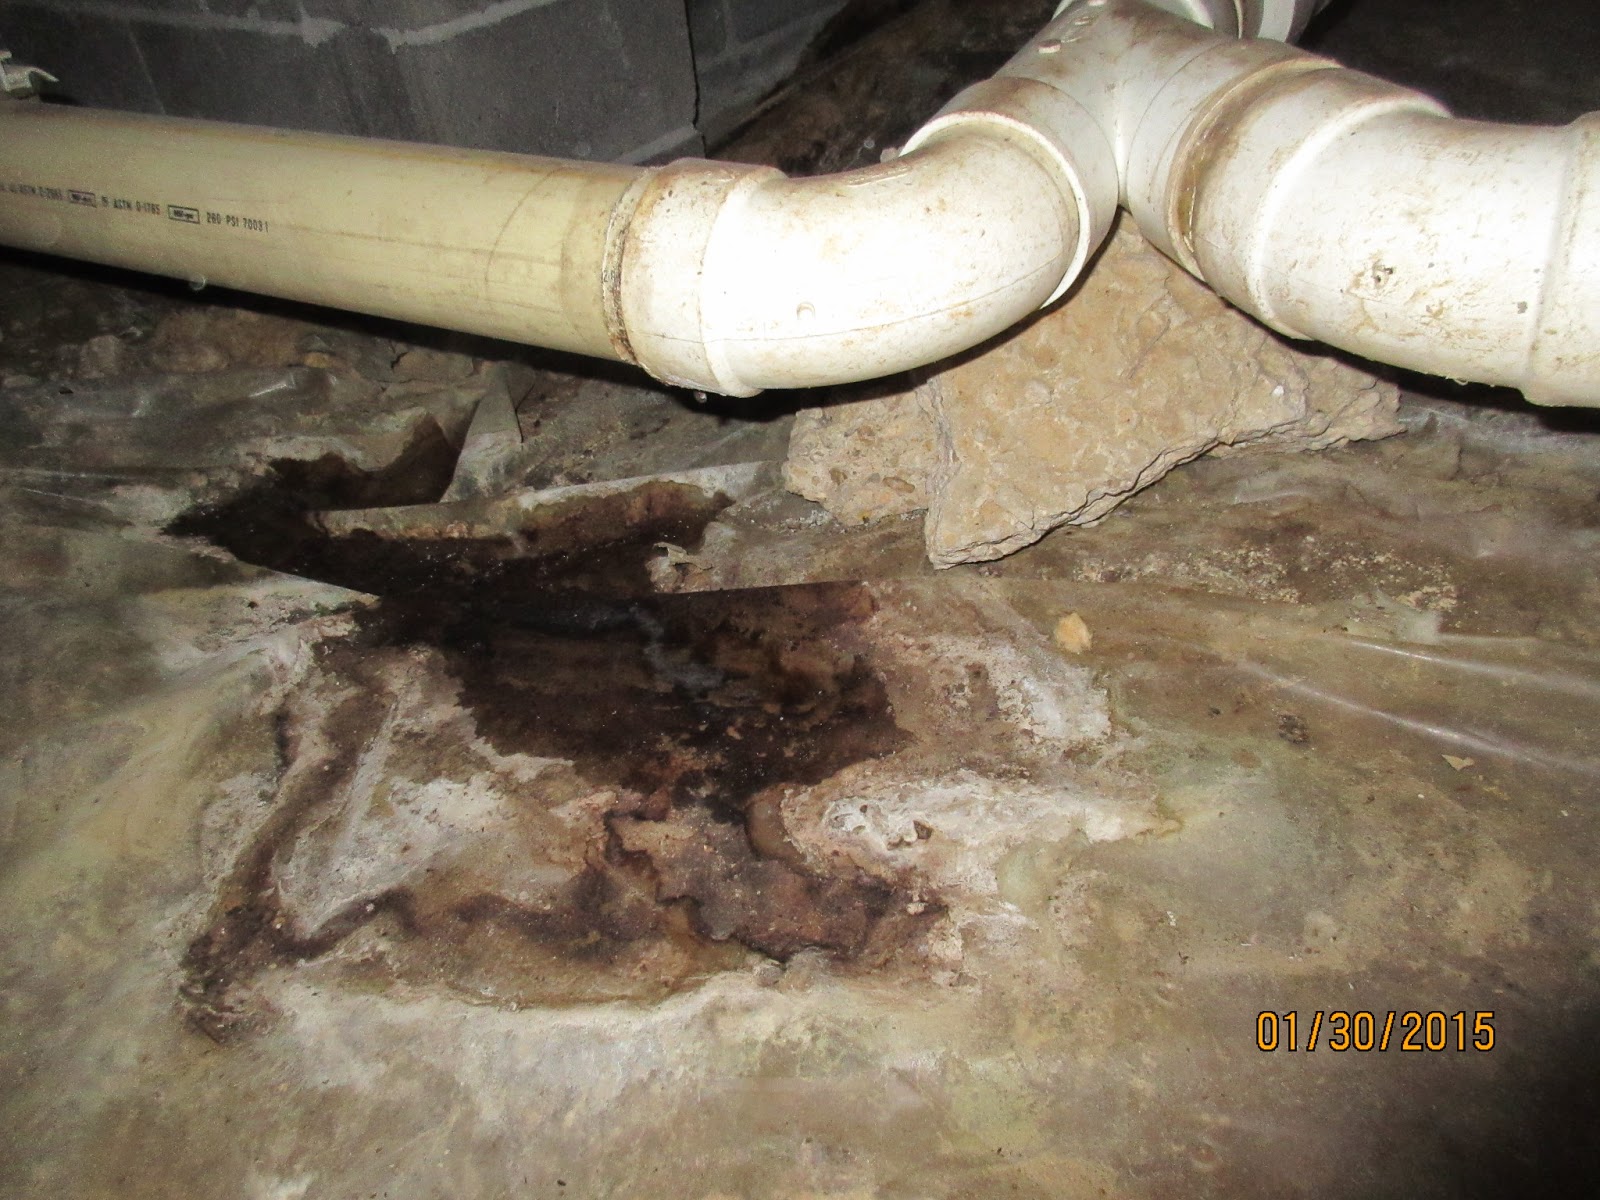
It will require more diligence on your part when you are buying an existing home and want to ensure you and your family will be breathing clean, healthy air. A home inspection by the highly trained professionals at Veteran Home Inspections can alert you to the presence of organic threats such as mold but you will need to go the extra mile in making sure the home does not contain dangerously high amounts of other chemical toxins.
The recent media coverage concerning high formaldehyde levels found in laminate flooring purchased through Lumber Liquidators has increased consumer awareness in regards to the number of household items and building materials that contain toxic levels of chemicals. As more consumers become aware of the chemical hazards found in flooring, common furniture and cabinet adhesives, particleboard furniture, and dozens of other building materials, consumer demand for safer building materials is on the increase.
The only way you can be certain the air you and your family are breathing is healthy is by performing an IAQ Home Survey test to alert you to the presence of indoor air pollutants. This test will provide you with an extensive and accurate assessment of a home’s air before you move in.
Veteran Home Inspections can provide you with high quality air testing for Volatile Organic Compounds, Formaldehyde, and even Tobacco Smoke Compounds.  Call 210-202-1974 today to schedule your IAQ Home Survey.  You can also schedule online at www.vhillc.com

Thursday, August 31, 2017

Flood-Damaged Homes & Buildings


by Nick Gromicko & Mike Marlow
 
Home and business owners should be prepared to protect themselves and their family members from the unique challenges posed by flood-damaged buildings. 
 
Hazards in and around flood-damaged buildings include the risks of:Good boots can protect against sharp debris in flood-damaged buildings
  • growth of large mold colonies;
  • septic system collapse;
  • trip-and-fall injuries;
  • structural collapse; 
  • fire and explosions; 
  • toxic sludge and materials containing waterborne bacteria; and 
  • electrical shock hazards.
Inspection Tips
  • Inspect the building exterior for downed power lines and gas leaks. Gas leaks will smell like rotten eggs. If you suspect a gas leak, contact the utility company immediately.
  • While entering the building, see if the door sticks at the top. If it does, this could mean that the ceiling is ready to collapse. After you open the door, stand outside the doorway, clear of any falling debris.        
  • Wear sturdy, treaded boots. According to the American Red Cross, the most common injury following a disaster is cut feet. Broken bottles, nails, glass, and other dangerous debris may litter the floor, and stairs may be very slippery.
  • Once you are inside the home, check for gas leaks again. If you smell gas or hear a blowing or hissing noise, open a window and quickly leave the building. Turn off the gas at the outside main valve, if you can, and call the gas company from a neighbor's home. If you turn off the gas for any reason, a professional must turn it back on. Never use an open flame inside of a flood-damaged house unless you know that the gas has been turned off and the house is ventilated. To inspect for damage, use a battery-powered lantern or flashlight, and not an open flame or electrical fixture in the house.
  • Do not use appliances that may have gotten wet unless you know they have been dismantled, cleaned and dried.
  • Do not work by yourself. If you are injured, it might take a long time before you receive assistance. If you must work alone, bring a cell phone or radio so you may call for assistance, if the need arises.
  • Bring a HEPA-rated respirator to use in case you detect extensive mold. If you are asthmatic or otherwise at heightened risk to mold exposure, leave the Large mold colonies have grown in this house, which was flooded when a water pipe burst building. Other personal safety equipment, such as gloves and coveralls, may also prevent contact with mold and other contaminants.
  • Examine doors, walls, windows, floors and staircases to make sure that the building shows no signs of potential collapse. Inspect for loose plaster, drywall, and ceilings that may fall. Also, inspect the foundation for evidence of cracks and other structural damage that may render the building uninhabitable.
  • Inspect for fire hazards, such as broken and leaking gas lines, flooded electrical circuits, and submerged furnaces and electrical appliances. Flammable and explosive materials may travel from upstream. Be aware that fire is the most frequent hazard in homes following floods.
  • Inspect for electrical system damage, such as broken and frayed wires, and burned insulation. You can turn off the electricity at the main fuse box or circuit breaker. If you have to step in water to get to the fuse box or circuit breaker, call an electrician first for advice. Electrical equipment should be inspected by a qualified professional and dried before being returned to service.  Salt water and brackish water can cause even more damage very quickly.
  • Inspect for sewage and water supply-line damage. If you suspect sewage lines have been damaged, avoid using the toilets and call a plumber. If water pipes are damaged, contact the water utility company and avoid operating the tap.
  • Use caution while inspecting crawlspaces for a variety of reasons, such as the presence of mold, sewage, asbestos, chemicals, rodents, and the risk of structural collapse.
  • Watch out for animals, especially poisonous snakes, which may have been washed into the building during the flood. You can use a stick to poke through debris to check for dangerous critters.
  • Food that has come into contact with floodwater may be contaminated and it must be thrown away.  Canned food may be salvageable if the can is not dented or damaged.
  • Sterilize water if it is of questionable purity. One easy way to do this is to boil it for at least five minutes. Water wells that may have been affected by floodwater should be pumped out and the water tested for purity before drinking.
  • Have exposed wires replaced by a qualified professional.
  • As much as possible, remove the mud and silt that has entered the home, both by shoveling and hosing the house down. Mud and silt contain sewage and chemicals from farms, factories, roads and buildings. Discard items, such as mattresses and wallboard, that may be contaminated by mud or silt.
  • Turn off the house’s electricity. Do this even if the power company has turned off electricity to the area.
  • Take pictures of the building and its contents for insurance purposes.
We here at Veteran Home Inspections wish everyone in the areas affected by Hurricane Harvey the best.  Take care and be safe.

Mike & Jamie Marlow
Veteran Home Inspections, PLLC
210-202-1974

Wednesday, August 23, 2017

Protect Your Property From Water Damage

With the predicted rainfalls coming from the hurricane headed towards the Texas coast, now is a good time to take a look around your property to see where your vulnerabilities to water are.  A little maintenance and repair now can keep you dry and keep your home or business safe.

Water may be essential to life, but, as a destructive force, water can diminish the value of your home or building. Homes as well as commercial buildings can suffer water damage that results in increased maintenance costs, a decrease in the value of the property, lowered productivity, and potential liability associated with a decline in indoor air quality. The best way to protect against this potential loss is to ensure that the building components which enclose the structure, known as the building envelope, are water-resistant. Also, you will want to ensure that manufacturing processes, if present, do not allow excess water to accumulate. Finally, make sure that the plumbing and ventilation systems, which can be quite complicated in buildings, operate efficiently and are well-maintained. This article provides some basic steps for identifying and eliminating potentially damaging excess moisture.

Identify and Repair All Leaks and Cracks
The following are common building-related sources of water intrusion:
  • windows and doors: Check for leaks around your windows, storefront systems and doors.
  • roof: Improper drainage systems and roof sloping reduce roof life and become a primary source of moisture intrusion. Leaks are also common around vents for exhaust or plumbing, rooftop air-conditioning units, or other specialized equipment.
  • foundation and exterior walls: Seal any cracks and holes in exterior walls, joints and foundations. These often develop as a naturally occurring byproduct of differential soil settlement.
  • plumbing: Check for leaking plumbing fixtures, dripping pipes (including fire sprinkler systems), clogged drains (both interior and exterior), defective water drainage systems and damaged manufacturing equipment.
  • ventilation, heating and air conditioning (HVAC) systems: Numerous types, some very sophisticated, are a crucial component to maintaining a healthy, comfortable work environment. They are comprised of a number of components (including chilled water piping and condensation drains) that can directly contribute to excessive moisture in the work environment. In addition, in humid climates, one of the functions of the system is to reduce the ambient air moisture level (relative humidity) throughout the building. An improperly operating HVAC system will not perform this function.
Prevent Water Intrusion Through Good Inspection and Maintenance Programs
Hire a qualified InterNACHI inspector to perform an inspection of the following elements of your building to ensure that they remain in good condition:
  • flashings and sealants: Flashing, which is typically a thin metal strip found around doors, windows and roofs, are designed to prevent water intrusion in spaces where two building materials come together. Sealants and caulking are specifically applied to prevent moisture intrusion at building joints. Both must be maintained and in good condition.
  • vents: All vents should have appropriate hoods, exhaust to the exterior, and be in good working order.
  • Review the use of manufacturing equipment that may include water for processing or cooling. Ensure wastewater drains adequately away, with no spillage. Check for condensation around hot or cold materials or heat-transfer equipment.
  • HVAC systems are much more complicated in commercial buildings. Check for leakage in supply and return water lines, pumps, air handlers and other components. Drain lines should be clean and clear of obstructions. Ductwork should be insulated to prevent condensation on exterior surfaces.
  • humidity: Except in specialized facilities, the relative humidity in your building should be between 30% and 50%. Condensation on windows, wet stains on walls and ceilings, and musty smells are signs that relative humidity may be high. If you are concerned about the humidity level in your building, consult with a mechanical engineer, contractor or air-conditioning repair company to determine if your HVAC system is properly sized and in good working order. A mechanical engineer should be consulted when renovations to interior spaces take place.
  • moist areas: Regularly clean off, then dry all surfaces where moisture frequently collects.
  • expansion joints: Expansion joints are materials between bricks, pipes and other building materials that absorb movement. If expansion joints are not in good condition, water intrusion can occur.
Protection From Water Damage
  • interior finish materials: Replace drywall, plaster, carpet and stained or water-damaged ceiling tiles. These are not only good evidence of a moisture intrusion problem, but can lead to deterioration of the work environment, if they remain over time.
  • exterior walls: Exterior walls are generally comprised of a number of materials combined into a wall assembly. When properly designed and constructed, the assembly is the first line of defense between water and the interior of your building. It is essential that they be maintained properly (including regular refinishing and/or resealing with the correct materials).
  • storage areas: Storage areas should be kept clean.  Allow air to circulate to prevent potential moisture accumulation.
Act Quickly if  Water Intrusion Occurs
Label shut-off valves so that the water supply can be easily closed in the event of a plumbing leak. If water intrusion does occur, you can minimize the damage by addressing the problem quickly and thoroughly. Immediately remove standing water and all moist materials, and consult with a building professional. Should your building become damaged by a catastrophic event, such as fire, flood or storm, take appropriate action to prevent further water damage, once it is safe to do so. This may include boarding up damaged windows, covering a damaged roof with plastic sheeting, and/or removing wet materials and supplies. Fast action on your part will help minimize the time and expense for repairs, resulting in a faster recovery.

For water intrusion and mold inspections, call Veteran Home Inspections at 210-202-1974.  You can also book online at www.vhillc.com

Thursday, May 25, 2017

Air Sampling for Mold Inspections

Since we are now certified to do mold testing, here is a quick article on the benefits and issues with doing air samples for mold testing.  Veteran Home Inspections can provide you with air sampling, tape lift sampling, and a complete mold inspection, which helps identify the causes of indoor mold. 


Taking air samples during a mold inspection is important for several reasons.  Mold spores are not visible to the naked eye, and the types of mold present can often be determinair sampleed through laboratory analysis of the air samples.  Having samples analyzed can also help provide evidence of the scope and severity of a mold problem, as well as aid in assessing human exposure to mold spores.  After remediation, new samples are typically taken to help ensure that all mold has been successfully removed.
 
Air samples can be used to gather data about mold spores present in the interior of a house.  These samples are taken by using a pump that forces air through a collection device which catches mold spores.  The sample is then sent off to a laboratory to be analyzed.  InterNACHI inspectors who perform mold inspections often utilize air sampling to collect data, which has become commonplace.
Air-Sampling Devices
There are several types of devices used to collect air samples that can be analyzed for mold.  Some common examples include:
  • impaction samplers that use a calibrated air pump to impact spores onto a prepared microscope slide;
  • cassette samplers, which may be of the disposable or one-time-use type, and also employ forced air to impact spores onto a collection media; and
  • airborne-particle collectors that trap spores directly on a culture dish.  These may be utilized to identify the species of mold that has been found.
When and When Not to Sample
Samples are generally best taken if visual, non-invasive examination reveals apparent mold growth or conditions that could lead to growth, such as moisture intrusion or water damage.  Musty odors can also be a sign of mold growth.  If no sign of mold or potential for mold is apparent, one or two indoor air samples can still be taken, at the discretion of the inspector and client, in the most lived-in room of the house and at the HVAC unit.  
Outdoor air samples are also typically taken as a control for comparison to indoor samples.  Two samples -- one from the windward side and one from the leeward side of the house -- will help provide a more complete picture of what is in the air that may be entering the house through windows and doors at times when they are open.  It is best to take the outdoor samples as close together in time as possible to the indoor samples that they will be compared with.
InterNACHI inspectors should avoid taking samples if a resident of the house is under a physician’s care for mold exposure, if there is litigation in progress related to mold on the premises, or if the inspector’s health or safety could be compromised in obtaining the sample.  Residential home inspectors also should not take samples in a commercial or public building.
Where to Sample and Ideal Conditions
In any areas of a house suspected or confirmed to have mold growth, air samples can be taken to help verify and gather more information.  Moisture intrusion, water damage, musty odors, apparent mold growth, or conditions conducive to mold growth are all common reasons to gather an air sample.  Samples should be taken near the center of the room, with the collection device positioned 3 to 6 feet off the ground.
Ten minutes is an adequate amount of time for the air pump to run while taking samples, but this can be reduced to around five minutes if there is a concern that air movement from a lot of indoor activity could alter the results.  The sampling time can be reduced further if there is an active source of dust, such as from ongoing construction.
Sampling should take place in livable spaces within the house under closed conditions in order to help stabilize the air and allow for reproducibility of the sampling and measurement.  While the sample is being collected, windows and exterior doors should be kept shut other than for normal entry and exit from the home.  It is best to have air exchangers (other than a furnace) or fans that exchange indoor-outdoor air switched off during sampling.
Weather conditions can be an important factor in gathering accurate data. Severe thunderstorms or unusually high winds can affect the sampling and analysis results.  High winds or rapid changes in barometric pressure increase the difference in air pressure between the interior and exterior, which can increase the variability of airborne mold-spore concentration.  Large differences in air pressure between the interior and exterior can cause more airborne spores to be sucked inside, skewing the results of the sample. 
Difficulties and Practicality of Air Sampling
It is helpful to think of air sampling as just one tool in the tool belt when inspecting a house for mold problems.  An air sample alone is not enough to confirm or refute the existence of a problem, and such testing needs to be accompanied by visual inspection and other methods of data collection, such as a surface sample.  Indoor airborne spore levels can vary according to several factors, and this can lead to skewed results if care is not taken to set up the sampling correctly.  Also, since only spores are collected with an air sample and may actually be damaged during collection, identification of the mold type can be more difficult than with a sample collected with tape or a cultured sample.
Air samples are good for use as a background screen to ensure that there isn’t a large source of mold not yet found somewhere in a home.  This is because they can detect long chains of spores that are still intact.  These chains normally break apart quickly as they travel through the air, so a sample that reveals intact chains can indicate that there is mold nearby, possibly undiscovered during other tests and visual examination. 
In summary, when taken under controlled conditions and properly analyzed, air samples for mold are helpful in comparing relative particle levels between a problem and a control area.  They can also be crucial for comparing particle levels and air quality in an area before and after mold remediation.  

To schedule your complete mold inspection and testing appointment, call 210-202-1974 or visit www.vhillc.com.

by Nick Gromicko and Ethan Ward
used with permission from: https://www.nachi.org/air-sampling-mold-inspection.htm

Monday, September 19, 2016

How to Clean Algae and Moss Off Asphalt Shingles

Stains on asphalt roofing shingles make a house look shabby, which detracts from its value. In some cases, stains are merely a cosmetic issue.  But sometimes they’re symptomatic of a problem that, if left unchecked, can lead to more serious damage and, eventually, roof failure. It's not always hard to distinguish the causes of stains, nor, in most cases, to get rid of them and prevent the stains from recurring.

Common Causes of Staining
Dark stains on an asphalt roof could be caused by a number of conditions, including:
Eroded mineral surface. If the roof-covering material has been on the house for 15 years or so, it could be that the surface granules are wearing off the shingles and the asphalt base is starting to show through. On older roofs, you may additionally see cracked and/or shingles with curled edges. If you determine that age and wear are the causes of darkening, it may be time for a new roof.
Algae growth. More often than not, blue, green or black stains on an asphalt-shingle roof are caused by algae. Algae staining begins with small spots which, over time, can develop into streaks. Algae stains, which are often mistaken for mold or mildew, aren't harmful to anything other than the appearance of asphalt shingles, but nobody likes the look.

Algae-stained asphalt-shingle roof (photo by author)

Moss. Green, velvety masses of moss often grow on north-facing roof surfaces and on tree-shaded roofs. Unlike algae, moss left on roof surfaces can develop beyond an aesthetic problem. It can infiltrate the roof structure underneath the shingles and make their edges lift and curl, which can lead to cracking and blow-off during high winds and storms. Heavy moss growth can actually form dams that can cause water to back up under the shingles and damage the roof deck. It's best to clean moss off a roof as soon as you notice it's growing there.

Safety First 
Both algae and moss can be easily removed from asphalt shingles with a 50/50 solution of chlorine bleach and water. Laundry-strength bleach is sufficient, or you can opt for any of a number of proprietary roof cleaners, some of which don't contain bleach, lye, or other potentially harmful chemicals.
Since bleach and some cleaners can be harmful to plants and humans, it's a good idea to take some precautions when working with them, including the following:
  • Wait for a calm, windless day to clean your roof.
  • Spray landscape plants near the house with water and cover them with tarps to protect them from chemical overspray and runoff.
  • Wear protective clothing, including long sleeves, pants and gloves, as well as goggles to protect your eyes, and shoes with high-traction soles.
Before climbing up to clean stains from your roof, be aware that about 30,000 people fall off ladders and roofs each year.  Consider using a safety harness, just as the pros are required to do, and follow the common-sense rules for properly positioning and using a ladder, which can be found in InterNACHI’s article on ladder safety.  Also, be sure to notify someone that you’ll be on your roof.  In case of an accident that incapacitates you, you’ll want someone to know where to look for you.

Upgear by Wenner Safety Harness (photo courtesy of The Home Depot)

How to Clean Algae and Moss from a Roof 
Apply the bleach solution with a garden sprayer. Let it stand on the surface for about 20 minutes, then rinse it off with spray from a garden hose. Don't let the bleach solution stand on the roof for more than 30 minutes or so without rinsing. And don't use a pressure washer, which can damage the shingles by removing their protective layer of asphalt granules.
If accumulations of algae or moss are heavy, at least some of it should wash off the roof surface right away with the stream from the hose. You can try brushing off algae and moss with a brush or broom with medium-stiff bristles, but don't scrub too hard. You don't want to separate the mineral granules from the shingles.
If chunks of algae or moss or heavy stains remain on the surface after rinsing, let the roof dry, then spray on the bleach solution again. Wait 30 minutes and rinse. Don't worry if some staining remains after the second rinse. It should wash off over time with exposure to rain and sunlight.
How to Prevent Algae and Moss Stains from Recurring 
Algae and moss tend to grow roof surfaces that are shaded and retain moisture. So, it’s a good idea to cut away tree branches that overhang the roof and block sunlight. Keep the roof surface clean by blowing off leaves and fallen branches during seasonal maintenance.


The red lines indicate where to install sacrificial metal strips 
to prevent algae and moss growth.

For long-term stain prevention, have zinc or copper strips installed under the cap shingles, leaving an inch or two of the surface exposed at roof peaks, along hips, and under the first course of shingles at the base of dormers. Copper and zinc are sacrificial metals that shed tiny bits of their surface with each rainfall. The metals coat the roof and inhibit organic growth for many years.
Following these maintenance tips can help homeowners enjoy an attractive roof.  They can also help extend the roof’s service life, which is important whether you plan to stay in your home or sell it in the future.
To have your roof inspected, visit us at www.vhillc.com

Source: https://www.nachi.org/home-depot-clean-algae-off-asphalt.htm

by Michael Chotiner of The Home Depot

Saturday, September 3, 2016

Moisture Intrusion: We Inspect For That

Moisture intrusion can be the cause of building defects, as well as health ailments for the building's occupants. Inspectors should have at least a basic understanding of how moisture may enter a building, and where problem areas commonly occur.

Some common moisture-related problems include:
  • structural wood decay; 
  • high indoor humidity and resulting condensation;
  • expansive soil, which may crack the foundation through changes in volume, or softened soil, which may lose its ability to support an overlying structure;
  • undermined foundations;
  • metal corrosion;
  • ice dams; and
  • mold growth.  Mold can only grow in the presence of high levels of moisture. People who suffer from the following conditions can be seriously (even fatally) harmed if exposed to elevated levels of airborne mold spores:
    • asthma;
    • allergies;
    • lung disease; and/or
    • compromised immune systems.
Note:  People who do not suffer from these ailments may still be harmed by elevated levels of airborne mold spores.
How does moisture get into the house?
Moisture or water vapor moves into a house in the following ways:
  • air infiltration. Air movement accounts for more than 98% of all water vapor movement in building cavities. Air naturally moves from high-pressure areas to lower ones by the easiest path possible, such as a hole or crack in the building envelope. Moisture transfer by air currents is very fast (in the range of several hundred cubic feet of air per minute). Replacement air will infiltrate through the building envelope unless unintended air paths are carefully and permanently sealed;
  • by diffusion through building material. Most building materials slow moisture diffusion, to a large degree, although they never stop it completely;
  • leaks from roof;
  • plumbing leaks; 
  • flooding, which can be caused by seepage from runoff or rising groundwater; it may be seasonal or catastrophic; and
  • human activities, including bathing, cooking, dishwashing and washing clothes. Indoor plants, too, may be a significant source of high levels of humidity.
Climate Zones
In the northern U.S., moisture vapor problems are driven primarily by high indoor relative humidity levels, combined with low outdoor temperatures during the winter. In the southern U.S. (especially the southeast), the problem is largely driven by high outdoor humidity and low indoor temperatures during summer months. Mixed climates are exposed to both conditions and can experience both types of problems. Humid climates, in general, will be more of a problem than dry climates. Wind-driven rain is the main cause of leaks through the building envelope.
Inspectors can check for moisture intrusion in the following areas:
Roofs
A roof leak may lead to the growth of visible mold colonies in the attic that can grow unnoticed. Roof penetrations increase the likelihood of water leaks due to failed gaskets, sealants and flashing. The number of roof penetrations may be reduced by a variety of technologies and strategies, including: 
  • consolidation of vent stacks below the roof;
  • exhaust fan caps routed through walls instead of the roof;
  • high-efficiency combustion appliances, which can be sidewall-vented;
  • electrically powered HVAC equipment and hot water heaters that do not require flue; and
  • adequate flashing. Oftentimes, inspectors discover missing, incorrectly installed or corroded flashing pipes.
Plumbing
  • Distribution pipes and plumbing fixtures can be the source of large amounts of moisture intrusion. If the wall is moist and/or discolored, then moisture damage is already in progress. Most plumbing is hidden in the walls, so serious problems can begin unnoticed.
  • One of the most important means of moisture management in the bathroom is the exhaust fan. A non-functioning exhaust fan overloads the bathroom with damp air. If the exhaust fan doesn’t turn on automatically when the bathroom is in use, consider recommending switching the wiring or switch. The lack of an exhaust fan should be called out in the inspection report. The fan should vent into the exterior, not into the attic.
  • The bathroom sink, in particular, is a common source of moisture intrusion and damage. Although overflow drains can prevent the spillage of water onto the floor, they can become corroded and allow water to enter the cabinet.  
  • Use a moisture meter to check for elevated moisture levels in the sub-floor around the toilet and tub.
  • Bathroom windows need to perform properly in a wide range of humidity and temperature conditions. Check to see if there are any obvious breaks in the weatherstripping and seals. Are there are stains or flaking on the painted surfaces?
  • Check showers and bathtubs. Is the caulking is cracked, stiff or loose in spots? Are there cracked tiles or missing grout that may channel water to vulnerable areas? If some water remains in the bathtub after draining, it may be a warning sign of possible structural weakening and settlement in the floor beneath the tub.
Utility Room
  • The water heater tank should be clean and rust-free.
  • The area around the water softener tank should be clean and dry.
  • Check that all through-the-wall penetrations for fuel lines, ducts, and electrical systems of heating system are well-sealed. All ducts should be clean and dust-free. Inspect the air supply registers in the house for dust accumulation.   
  • Filters, supply lines, exterior wall penetrations, vents, ductwork and drainage of the cooling system must all be in good working order to avoid moisture problems.  
Attic
  • Look for stains or discolorations at all roof penetrations. Chimneys, plumbing vents and skylight wells are common places where moisture may pass through the roof. Any such locations must be inspected for wetness, a musty smell and/or visible signs of mold.
  • Are there areas of the insulation that appear unusually thin?
  • Rust or corrosion around recessed lights are signs of a potential electrical hazard.
Foundations

Model building codes typically require damp-proofing of foundation walls. The damp-proofing shall be applied from the top of the footing to the finished grade. Parging of foundation walls should be damp-proofed in one of the following ways:
  • bituminous coating;
  • 3 pounds per square yard of acrylic modified cement;
  • 1/8-inch coat of surface-bonding cement; or
  • any material permitted for water-proofing.

In summary, moisture can enter a building in a number of different ways. High levels of moisture can cause building defects and health ailments. 

To schedule your home inspection including a detailed check for moisture intrusion, visit www.vhillc.com

by Nick Gromicko and Kenton Shepard

 https://www.nachi.org/moisture-intrusion.htm

Saturday, January 31, 2015

What were they thinking?

As promised, a summary of the interesting things I found on yesterday's home inspections.  These were two nice looking homes that had some serious issues.  Enjoy!

As Paul Harvey would have said, here is the rest of the story on the teaser video I posted yesterday.  When my client and I were in the crawlspace, I bumped into a support pillar, and it moved, a lot!  There were several pillars installed with dry-stacked cinder blocks (no mortar at all).  They were all loose, and no longer providing support to the beams supporting the floor joists.  They may have provided support when they were installed, but without the necessary footers, they had settled and were no longer supporting the beams.


The three columns in this picture were all loose, and yes, that first one really was leaning as much as it appears.  The beam above it was quite loose and could be moved by hand.


While in the crawlspace, we noticed a lot of water on the underside of the vapor barrier.


Unfortunately, the vapor barrier was only partially installed, which was probably the cause of the increased moisture in the crawlspace materials.


This is the reading from the moisture meter in the above picture.  As you can see, it's wet!  This can not only lead to mold, but also rot and wood destroying insect infestation.


Which might have been the cause of the mold-like substance we found growing on the joists and subfloor.


Or maybe the moisture was coming from the sewage leaking from the drain lines.


Either way, it was causing a lot of corrosion to the electrical system components.


This is what happens when your toilet is loose and the wax ring doesn't seal anymore.


The attic wasn't immune to moisture problems either.  Where do your bathroom exhaust fans terminate.  The correct answer should be outside.  The black stuff on the underside of the roof sheathing wasn't paint...


And the electrical issues continued in the attic too!


Those were all just from the morning inspection.  Now on to the afternoon inspection.

The electrical in this attic was just as good as the first house.  


The yellow and orange wires were connected to a plug and then ran across the attic to a bedroom closet ceiling light.


These wires almost made it to the junction box, I guess the electrician didn't have his wire stretcher with him.


There are a couple issues in this picture.  First, the duct work is the supply side, and is not insulated.  This can be a huge energy loss and they should have used insulated duct work.  The other issue, is a bit more serious.  The metal tab on the rafter is where a truss member used to be.  I guess the HVAC duct was more important than the roof support.


Of course when you look at how they installed the HVAC itself, you get the idea that maybe this wasn't a professional job.  The outside AC compressor was from 2001, and I would guess the inside unit was the same.  I can only guess, because that vertical truss member was obscuring the data plate.  It was also preventing the access cover from being removed, so I'd pretty much guarantee the inside of the unit has never been checked or cleaned.  


This is the view of the fireplace flue looking from the attic above the 2nd floor all the way to the fireplace on the first floor.  In the unfortunate event of a fire, it would be able to quickly spread from the first floor to the attic.  This is one of the primary reasons we stopped using balloon construction in houses.


These are the drain lines for what I suspect is an unpermitted half bath. Drain lines are not supposed to be this steep, unless they are more than 45 degrees down angle.  Steep slopes (more than 1/2":12" up to 45 degree supposedly lead to clogs as the water leads the solids behind.  


This was a floor joist in the new addition (done with a permit) but the code inspector missed this one.  For some reason plumbers forget to reinforce the joists the hack away when they need to run their plumbing in the same place.


That's all for now folks.  Stay safe out there, and remember to hire the best home inspector you can find.  For more on our services, check out www.vhillc.com


Tuesday, January 20, 2015

Disaster house

Today's post is a bit different from my past posts, as all of the issues are from one house.  I inspected this house for an investor client and couldn't believe the number of issues I found.

The trim around the house was deteriorated in several locations.  This one had sagged so much that a family of birds had moved in!


The sill plate under the deck ledger had deteriorated so much that I was able to push a car key in with no effort at all.  This will be a major repair, as the entire exterior wall sits on this piece of wood.


 The siding on this, and several other houses in the area, was falling off.  This makes me wonder if an incompetent contractor went through after a storm and got a bunch of people to let them make repairs.


 This is the ceiling in the garage where the exterior trim was damaged.


Here is the master bedroom closet right above that mold stain in the closet.


Hopefully most people realize that trees should be kept away from the roof to prevent damage, but this tree had already made its mark on the roof.


This is what I found in the bedroom closet right under where the tree had damaged the roof.  


Even though this water damage was fairly evident, here's what it looked like on the thermal imaging camera.


It took me a minute to figure out what they had done here.  This is actually the sump pump discharge.  No, it shouldn't be dumping into the house's drain system, and that's just where the problems began.


This breaker was for the heat pump, and was overheating quite a bit.


Thankfully it stood out quite clearly on the thermal imaging camera.


This was the ductwork, and it's one of the worst I've seen.  I have a feeling this will require a complete replacement of the ductwork.  I couldn't get a picture of the inside, but I wouldn't want to breath the air coming out of it.


A neighbor told me that the basement had flooded at least once.  The fuzzy walls in the basement confirmed it.


 What's missing on this bathroom sink...hint for the Star Wars fans out there...It's a Trap!


 This addition was just screaming for attention.  I would guarantee there was no permit pulled for this one.  It was built on the old patio slab and supported with 4x4s.  Inside the drywall was cracked in many places, and I would have to say there was some structural movement going on.


This is the underside of the addition, and aside from the insulation being installed upside-down, you can see the deteriorating support posts.  This is one addition that will probably not be able to be retroactively permitted.  My advice to my client was to plan on it coming down.


Just for a little humor, this was posted on the electric furnace.


I always harp on making sure that your home inspector goes into the attic.  This is one of the few I didn't go into, since the critter this bait was set up for didn't take the bait and was still hanging out.  


That's all for now folks.  Stay safe out there, and remember to hire the best home inspector you can find.  For more on our services, check out www.vhillc.com